

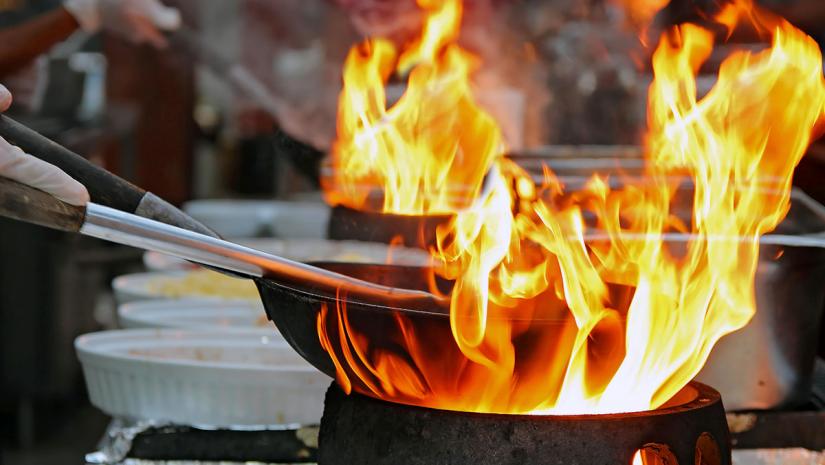
For generation after generation, the cast iron skillet has remained an indispensable tool in both professional kitchens and home country outposts. While modern cookware brands frequently market non-stick coatings and space-age materials, nothing has ever truly matched the raw, unyielding power of a heavy piece of seasoned cast iron when it comes to rendering fat and developing a flawless crust.
Searing a premium cut of meat is not merely a matter of applying heat to protein. It is a precise physical and chemical transformation. When a cold piece of steak, pork chop, or thick fish fillet hits a ripping hot surface, it undergoes the Maillard reaction. This complex chemical process browns the amino acids and natural sugars, building hundreds of deep, savory flavor compounds that give seared food its distinct culinary appeal.
To consistently achieve a uniform, mahogany crust without burning your food or drying out the interior, you must understand the mechanics of heat retention, surface prep, and fat dynamics. By mastering these foundational cast iron principles, you can elevate your pan-searing technique to professional standards.
1. Harnessing the Power of Thermal Mass and Preheating
The primary reason cast iron is the undisputed king of searing is its exceptional thermal mass. Cast iron is a dense, heavy material. While it takes longer to heat up than thin aluminum or stainless steel pans, it holds onto that heat with incredible tenacity.
When you place a cold, raw steak into a lightweight stainless steel pan, the pan temperature immediately drops, causing the meat to release its internal juices and simmer in its own liquid rather than sear. A heavy cast iron skillet, however, acts as a heat battery. It shrugs off the cold temperature of the meat, maintaining its searing energy and instantly sealing the surface of the protein.
To unlock this thermal advantage, you must preheat your skillet thoroughly and gradually.
-
Low and Slow Warming: Never place a cold cast iron pan directly onto a high flame, as this can cause uneven hot spots or even warp the metal. Instead, place the pan over medium-low heat for ten to fifteen minutes. This allows the heat to migrate evenly from the center of the pan out to the heavy rims.
-
The Screaming Hot Finish: Once the pan is uniformly warm, crank the heat up to medium-high for the final two to three minutes before introducing your fat and protein. You will know the pan is ready when a drop of water flicked onto the surface instantly balls up and dances away before vaporizing.
2. Eradicating Surface Moisture for an Immediate Sear
The ultimate enemy of a perfect sear is water. In the world of high-heat cooking, steam is a destructive force. Before your meat can develop a crisp, brown crust, the heat of the pan must first evaporate every single molecule of surface moisture sitting between the metal and the protein. If the meat is wet, it will boil and steam in the pan, turning a dull, rubbery gray color.
To circumvent this issue, professional chefs prioritize comprehensive moisture management.
-
The Paper Towel Press: Take your meat out of its packaging and pat it dry with heavy-duty paper towels. Press firmly across all sides, edges, and crevices to wick away any surface condensation or packaging liquids.
-
The Dry Brining Technique: For the absolute best results, salt your meat generously with coarse kosher salt and place it uncovered on a wire rack inside your refrigerator for twelve to twenty-four hours before cooking. The salt draws internal moisture out to the surface, dissolves into a concentrated brine, and is eventually reabsorbed deep into the muscle fibers, seasoning the meat thoroughly. Meanwhile, the dry refrigerator air completely dehydrates the exterior skin or fat cap, leaving behind a tacky, perfectly dry surface that is primed for an instant, deep sear.
3. Selecting and Managing High Smoke Point Fats
Once your skillet is preheated and your protein is completely dry, you need to select the appropriate fat medium to bridge the gap between the hot iron and the meat. The fat fills in the microscopic air pockets on the pan surface, ensuring uniform heat transfer.
Because perfect searing requires temperatures between 400 and 450 degrees Fahrenheit, you must use a fat with a high smoke point. If you use a delicate oil, it will break down, smoke aggressively, and release bitter compounds that ruin the flavor of your food.
-
Ideal Searing Fats: Avocado oil, refined coconut oil, canola oil, beef tallow, and clarified butter (ghee) are exceptional choices because they can withstand temperatures up to 450 or 500 degrees Fahrenheit without scorching.
-
The Timing of Real Butter: Many cooks make the mistake of adding standard whole butter to the pan at the very beginning of the process. Whole butter contains water and milk solids that burn instantly at searing temperatures. Instead, utilize the professional technique of butter basting during the final two minutes of cooking. Drop a large knob of whole butter, along with smashed garlic cloves and fresh rosemary, into the pan once the main crust has already formed. Tilt the skillet slightly and use a large spoon to continuously cascade the foaming, nut-brown melted butter over the top of the meat to finish it with a rich, glossy glaze.
4. The Geometry of Contact and Contact Pressure
A common flaw in home-cooked steaks is an uneven sear, where the edges are beautifully browned but the center remains pale and untouched by the flame. This occurs because muscle fibers contract sharply when they contact intense heat, causing the meat to buckle, cup, or curl upward.
To achieve an even, edge-to-edge crust, you must ensure maximum physical contact with the bottom of the skillet.
-
Avoid Overcrowding the Pan: Always leave ample breathing room around your protein. If you try to crowd three large ribeyes into a single ten-inch skillet, the ambient temperature of the pan will plummet, and the moisture escaping from the meat will become trapped, steaming the food. Cook in batches, or utilize a secondary skillet if preparing food for a large group.
-
Apply Intentional Pressure: When you first drop your seasoned protein into the hot oil, use a heavy stainless steel spatula or a dedicated cast iron meat press to push down firmly on the meat for the first thirty seconds. This counters the initial muscular contraction, locking the entire surface flat against the screaming hot cast iron for a flawless, uniform start to your sear.
5. Trusting the Release and Monitoring Internal Doneness
One of the most intimidating aspects of cast iron cooking for beginners is the fear of food sticking to the pan. However, a properly seasoned cast iron skillet possesses natural non-stick characteristics that work in tandem with the cooking process.
When you first drop a piece of protein into the pan, it will naturally stick to the iron. Do not panic, and do not attempt to pry it loose with a fork or spatula. If you try to force it too early, you will tear the delicate meat fibers and ruin the crust.
Trust the science of the sear. As the Maillard reaction completes its initial phase, the proteins change shape and naturally release themselves from the iron surface. When the crust is ready, the meat will slide cleanly across the pan with minimal resistance. If it is resisting, it is telling you it needs another thirty to sixty seconds of uninterrupted contact to finish building its structural shell.
Frequently Asked Questions
How do I maintain the seasoning on my cast iron skillet if I am constantly searing at extreme temperatures?
High-heat searing can slowly degrade the layer of polymerized oil that forms your pan seasoning. To maintain a slick, resilient surface, always clean your pan immediately after it cools down using hot water and a stiff brush. Avoid using harsh abrasive metal scrubbers unless you are stripping rust. Once clean, dry the skillet completely over a warm stove burner to ensure no moisture remains, then apply a microscopic layer of high-smoke-point oil, rubbing it into the iron with a paper towel until the pan looks completely matte rather than greasy.
Why does my kitchen fill with heavy smoke even when I am using a high smoke point oil like avocado oil?
While a high smoke point oil reduces the chemical breakdown of the cooking fat, high-heat searing will always generate a significant amount of smoke due to the vaporization of surface moisture, melting animal fats, and loose seasonings like black pepper. To manage this, ensure your kitchen ventilation hood is set to its highest level before you start cooking, open a nearby window, and consider saving coarse black pepper additions for the end of the cooking process, as pepper flakes char quickly and create heavy, acrid smoke.
Can I achieve a good sear on a cast iron pan if the meat is cooked straight from the refrigerator?
While you can achieve a decent sear straight from the refrigerator, it is highly advantageous to let your protein sit on the counter for twenty to thirty minutes before cooking to take the chill off. Dropping an icy cold piece of meat into a hot skillet causes a more violent contraction of the muscle fibers, which pushes internal water out to the surface and triggers a minor drop in pan temperature. Bringing the meat closer to room temperature ensures a faster sear and a more evenly cooked interior.
What is the exact difference between a standard cast iron pan and an enameled cast iron skillet for searing?
Standard raw cast iron can handle higher, unrestricted temperatures and develops a superior non-stick patina over time through oil polymerization, making it the preferred choice for rustic, high-heat searing. Enameled cast iron features a smooth glass coating fused to the metal. While it provides exceptional heat retention and requires zero seasoning maintenance, the enamel surface cannot be used with ultra-high, dry heat without risking cracking or damaging the glaze. It is better suited for braises and moderate pan-frying.
Should I use coarse kosher salt or fine table salt when prepping meat for a cast iron sear?
Always choose coarse kosher salt or flaky sea salt over fine table salt for searing prep. The larger crystal structure of kosher salt allows you to see exactly how much seasoning you have applied, ensuring you do not accidentally over-salt the food. Furthermore, fine table salt dissolves too rapidly and can create a dense, watery surface layer that inhibits the dry environment necessary for a fast Maillard reaction.
How do I know if my cast iron skillet has lost its seasoning and needs to be completely re-baked?
A pan needs to be completely re-seasoned if you notice visible gray patches of bare iron, persistent rusting, or if food consistently sticks and tears despite using adequate cooking oil. If the surface is merely dull but otherwise smooth, you do not need to strip the pan; simply continue cooking high-fat foods like bacon, or apply a thin layer of oil and bake the upside-down pan in a 450-degree oven for an hour to reinforce the protective coating.